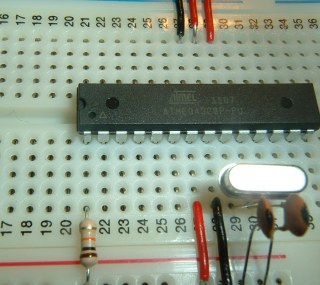
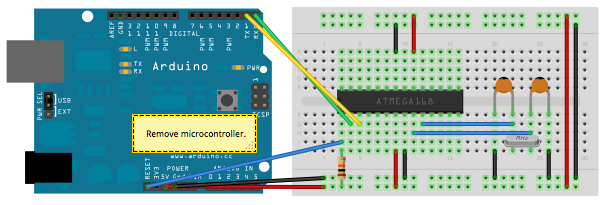
This article is about how to upload sketch to Atmega328 on a breadboard using Arduino UNO as the AVR ISP (In-System Programmer). You need to have a bootloader burned into the Atmega328 on the breadboard which will be loaded with the sketch before you could upload sketch to the Atmega328. If you haven't done so, please refer to this article.

Unless you choose to use the minimal configuration, you'll need four components (besides the Arduino UNO, ATmega328, and breadboard):
- a 16 MHz crystal,
- a 10k resistor, and
- two 18 to 22 pico farad (ceramic) capacitors.

There are four or five connections you will need to make:
- Arduino UNO Pin 0 (Rx) to IC pin #2
- Arduino UNO Pint 1 (Tx) to IC pin #3
- Arduino UNO Reset to IC pin #1
- Arduino UNO Ground to breadboards ground rail
- Arduino UNO 5V (Vcc) to breadboard Vcc rail (if you want to power the breadboard from the Arduino board)

To upload the sketch, you simply plug in the board into the USB port, select the correct target from the "Board" menu and watch the magic happen. Keep in mind that you choose the target based on the bootloader burned into the chip, not the board you are using to upload the code.
IMPORTANT NOTE:
- If you have the Optiboot bootloader on the ATmega328P, you should treat it an an Arduino UNO, not an Arduino Duelmilanove. The main difference is the baud rate the bootloader uses.
- There is no need for the 0.1uF decoupling capacitor between Vdd and Gnd pins.
Sources:
No comments:
Post a Comment